Do you know what a brake pad is? How do you know if you need a new one for your car?
Believe me, it’s fascinating to learn how to change your brakes, find out in 7 steps.
What Are Brake Pads & How do They Work?
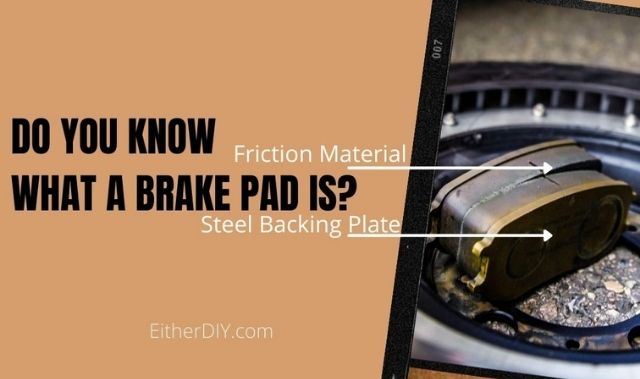
Brake pads are made up of friction material and other components bonded to a solid steel backing plate.
When you depress the brake pedal, the friction material of the brake pads is pushed under tremendous pressure against the inner and outer surfaces of the steel brake rotor.
The resulting friction causes your car’s wheels to slow down quickly, allowing for a safe and quick stop, controlled by the ABS.
After thousands of miles, this friction material wears out faster than the brake rotor, which also wears out, requiring replacement. So what do you need to know about brake maintenance?
Brake Maintenance
When should you replace your brake pads? And, what are the signs to look out for?
Here are four signs that you need new brake pads:
Wear indicator
Wear indicator on the vehicle’s dashboard. When the friction material of the brake pads is worn down to 2 mm from the backing plate of the pad, pad replacement is necessary. Do not intentionally use up all the lining before changing it as this will damage the surface of the rotor disc. Most newer cars have an electronic system built into the brake pad, while others use a warning light in the fluid reservoir to indicate a drop in friction material level.
When the pad needs to be replaced, a symbol appears on your vehicle’s dashboard. Check your owner’s manual if you don’t already know what this symbol looks like.
High-pitched squeal
A high-pitched squealing noise during braking. When the friction material in the brake pads is worn near the backing plate, you may hear a squealing or screeching noise when you drive, whether you apply the brakes or not. This squeaking or squealing noise is intended to make you aware that the brake pads are starting to wear out and need to be inspected. If all the friction material in the brake pad has been worn away, you will hear squealing and grinding noises when you apply the brakes. Replacement of the brake pad is mandatory at this point and the vehicle is unsafe to drive until the situation is corrected.
Pedal Pulse
Brake pedal pulsation or vehicle vibration. Over time, brake rotors may exhibit excessive thickness variation that causes deformation due to high operating temperatures. If these defects exist, you may notice pulsations when you depress the brake pedal while driving.
At this point, new pads and resurfacing or replacement of the rotor will be required if the rotor exhibits any of the above deficiencies. Let’s see the last probable sign.
Deflection under braking
The vehicle pulls or skids under braking. If your car pulls to the right or left when braking, it can be a sign of a sticking brake caliper, suspension misalignment, and sometimes tire defects or uneven inflation from side to side.
Regardless of the appearance of any of the above brake system symptoms, measure the thickness of the friction material remaining on the brake pads every 24,000 km and perform a complete visual inspection of the brake system.
Brake system warning lights or service reminder messages. If the brake system warning light comes on or if a brake system service reminder message appears on the driver information display such as the ABS warning light, inspect and repair your vehicle as soon as possible. Are you driving safely?
Is it safe to drive with a brake pad problem?
Do you notice these signs :
-
Stopping distances are much greater than you are used to.
-
The brake pedal is not firm or is low.
-
A loss of brake assist.
-
The vehicle pulls severely to one side when braking.
-
The brake system light stays on.
-
Squeaks and squeals.
Driving a vehicle with a known brake system deficiency is unsafe and not recommended. Worn brake pads can increase stopping distances.
Here are Three Qualities Of a Brake Pad.
1- Safety
-
Long service life due to mechanical strength and high temperature resistance (up to 800°C).
-
Stability of the friction coefficient in all possible situations and braking conditions.
-
Insensitive to environmental influences such as water or dirt
-
Good running-in properties
2- Comfortable
-
No noise or vibrations
-
Low brake pedal force is sufficient
-
No environmental pollution due to abrasion of the elements
3- Cost-effectiveness
-
Low wear of the friction pad and brake disc
-
Low weight
-
Economical production costs
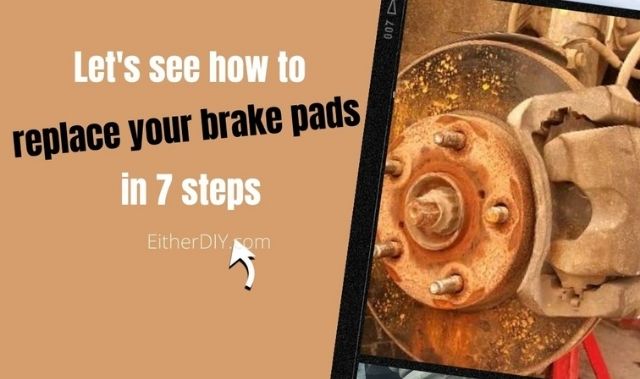
Think about your safety, replace worn brake pads quickly. do you know how to replace your brake pads
How to replace brake pads?
Normally, replacing brake pads requires the following steps:
-
Confirm the thickness of the friction material remaining on the brake pads. If the thickness of the remaining friction material is close to or less than 2 mm, pad replacement is warranted.
-
Visually inspect the surface of the brake rotor that is in contact with the pad (for scratches, pitting, grooves, rust) and measure the brake rotor with precision tools for thickness variations, runout and warpage.
-
Inspect the caliper, torque plate, pads and rotors to determine if the caliper operates freely (that is, check if the caliper is stuck).
Install new brake pads
Step 1. Park the car on a level surface. If the transmission is manual put it in first gear. For an automatic transmission put the selector on (P) Get out of the car then place at least two chocks to block a wheel on the axle you are not working on yet.
Step 2. Take out of the car everything you are going to use:
- Wheel wrench
- Jackscrew
- Wrench kit
- Brake piston press tool
- New brake pads
Step 3. Loosen with a wheel wrench the two wheels, be careful not to unscrew, raise the axle to the crossmember with the jack. If your jack is too weak to support the weight of the axle, raise one wheel to the most pocketed area of the chassis or a safe place under the bottom plate of that wheel. Remember to secure the raised part(s) with jack stand for added safety.
Step 4. Completely unscrew the wheel, and place it halfway under the car, being careful not to shake the car too much.
Step 5. Remove the worn pads. On some vehicles you will have to detach a simple hook to remove the pads but for most you will have to loosen and unscrew all the screws on the moving part of the caliper. Watch carefully to note the mounting direction before removing the pads.
Step 6. Push back the caliper pistons with a Brake piston press to make room for the new brake pad.
Step 7. Install your brakes, make sure the brake pad guide studs are secure then aim the caliper or reassemble the hooks. Reassemble the wheel to finish.
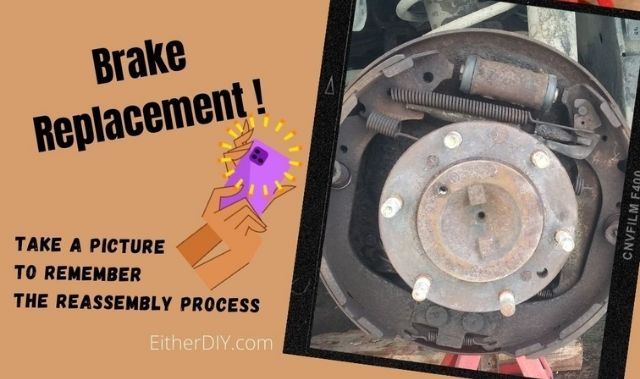
Finally If you have to work on a drum brake system, after removing the brake drum, take a picture that will help you later on when reassembling the set:
- Brake cylinder
- Retracting spring
- Primary brake shoe
- Secondary brake shoe
- Parking brake line
- Hand brake lever
- Hold-Down spring
- Adjusting screw
- Adjusting lever spring
- Adjusting spring
If you have not unscrewed the brake hoses and change the brake fluid, no need to bleed the brake system.
Top up the brake fluid if necessary.
When replacing the brake pads, remember:
Brake pads should always be replaced in sets, meaning both wheels (driver and passenger side) of an axle, front or rear, should be serviced
If the brake pads have only been replaced on one side of the car, your car may pull to one side when you apply the brakes. Often, resurfacing or replacing the brake rotors is necessary.
Da whenever possible follow the information from your manufacturer. Your safety is paramount!
Either do it yourself or pay for it
If you are not sure if you can replace your brakes yourself for the first time.
Here is a tip to kill two birds with one stone:
💡Call a home repair service and learn from them so you can do it yourself the next time.
Just so you know, I always service my brake system regularly at home.
Good luck in your repairs friends!
See Also
-
Tire Maintenance -
Power Steering Rack and Pinion Removal Procedure on Rav4 2002 -
Car Alternator Repair: know Symptoms and Kow to Fix -
What is the Best Car Battery to Buy? -
How to Replace Coolant -

How to Choose the Right Oil Before Changing your Oil? -
Regular Maintenance of the Vehicle -
How To Keep a Vehicle Maintenance Log?