“The garage broke my lug nut” I often hear people lament about this incident. Do you know how it happens? How to avoid this? If it has already happened, how to repair it?
let’s see…
How does Broken Wheel Nut Happens
Most of the time, a wheel nut that is too tight or sometimes oxide nut broke when unscrewing! This can also happen when over tightening too.
That’s why I advise you to scre w your nut by hand and then tighten it with a wrench or an impact screwdriver.
Like that, you will avoid the cross-threading accident, spinning or broken.
How to Avoid Breaking your Lug Nuts when uptight them?
Here’s a trick that has always worked for me: When I can’t loosen a nut on the first try, I use WD-40 or water and hit the edges of the nut or the hexagonal head of the screw with a soft hammer or a carpenter’s hammer gently.
I repeat the operation once or twice and then I loosen the nut or the screw without forcing too much with the wrench.
In most cases, it works, but accidentally a screw can break instead of being pulled out. If this happens to your car wheel, it’s not the end of the world. Let’s see how to fix it !
How to REMOVE & REPLACE a Broken Lug Nut?
It all depends on the type of car you have.
On most cars, the screw goes through the disc rotor and is stuck in it from the inside and then blocks it with the wheel rim from the outside through the nut. This is the case for the TOYOTA brand.
On cars like the BMW, the screw blocks the wheel rim on the rotor disc going to be screwed to the thread of this one. On this type of wheel, we don’t need a nut.
Therefore, my friends, we do not solve a problem of broken screw in the same way on these two models.
Watch those videos below to see how I solved a broken screw problem on a Toyota Rav4!
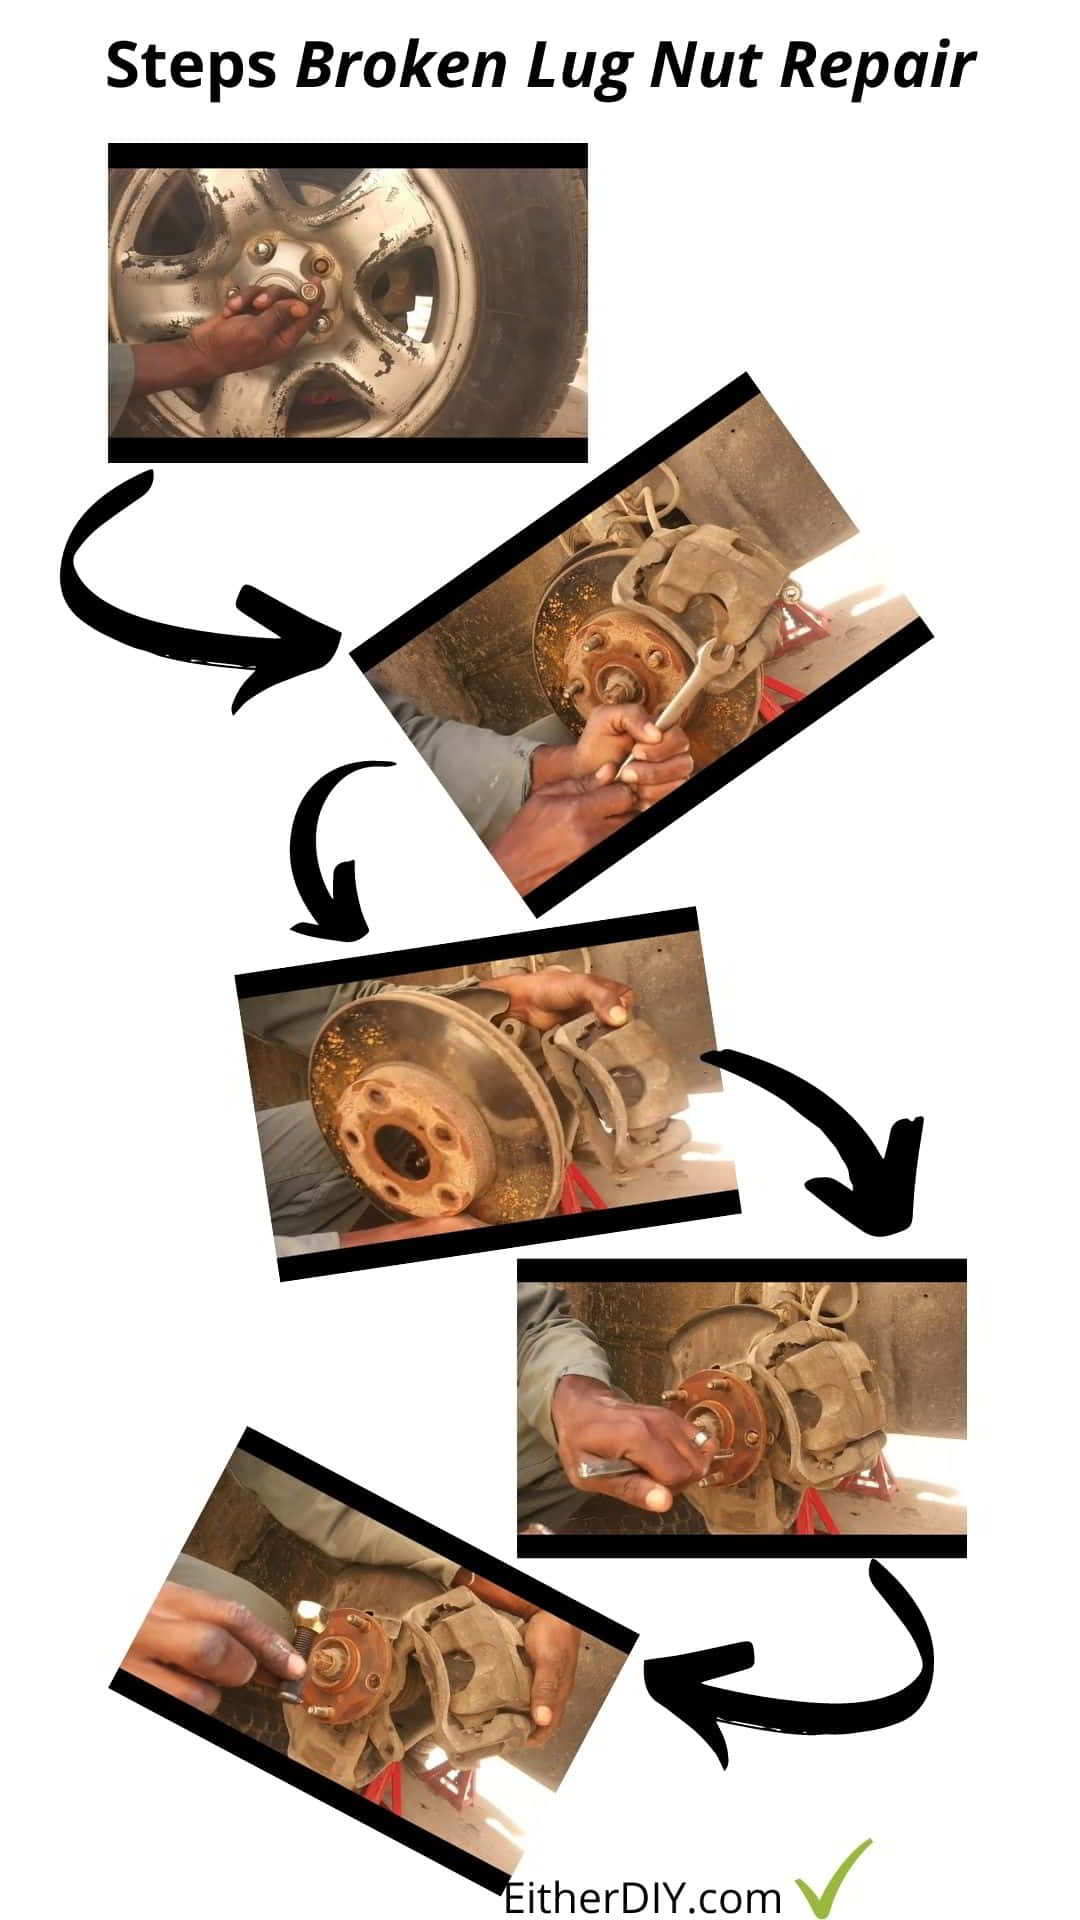
Step 1
After loosening the wheel nuts, jack up the wheel and place a stand for safety, then depending on your AWD, 4WD transmission type, put the transmission or dual in neutral so the wheel can spin freely. Then unscrew the wheel completely and remove it.
Step 2
Unscrew the caliper body onto the bracket as shown in the video using wrenches smartly to get the job done.
Step 3
Unscrew the bracket onto the steering knuckle. Pull up and hold the caliper to remove the rotor disc and secure the caliper to its location by the bracket with a screw to the spindle.
Step 4
Turn the hub bearing assembly to give free access to the broken nut front and back, then tap the broken surface with a punch and hammer and remove it.
Step 5
After you have your new lug nut. Replace it like you removed the old one. Use WD-40 to clean the area and then install the wheel bolt. Make sure you riveted the knurled head to the hub spline, then install the rotor disc, caliper and wheel.
For models like the BMW: you will need a drill and a steel drill bit of 8-10mm diameter to drill the broken screw and remove it. Depending on the length of the broken screw, I prefer to weld a piece of iron to its end and then unscrew it with a pipe wrench. This method becomes easier because the heat from the welding has already heated the broken screw, so it becomes easier to remove and you don’t risk your rotor threads.